
WHAT YOU’LL NEED:
- 1 sheet 12×12 kraft cardstock
- 1 sheet 12×12 red cardstock
- 1 sheet 12×12 white cardstock
- 1 brad
- Adhesive or glue
- 3D Mailbox cut file
HOW TO:


Let’s assemble the door to the mailbox. Take one of the edge pieces, with the spiky tops, and adhere the design pieces to it. I cut those out of a white cardstock. We need to give the door an edge. Fold down the side tabs, as well as the spiky top tabs, towards the back of the door. The long, thin strip is the edge piece. Using adhesive or glue, adhere the edge piece to the folded down tabs. Our door is ready.

The next step is assembling the arched top of the mailbox, and the back. This is similar to assembling the door, except our edge piece is now the top, and much wider. Fold down the side tabs, as well as the spiky top tabs. Before you adhere the arched top, look where the hole is positioned on the top piece. That hole is for the flag of the mailbox. When you’re looking a the back of the mailbox, the hole needs to be on the right side, and positioned close to the door of the mailbox, and not the back. Once you have that in position, use glue or adhesive to adhere the top piece to the back, using those folded tabs. The front of the mailbox will be a bit warped at this point. That will be fixed soon.

Now that we have the top piece assembled, let’s attach it to the bottom piece. Fold up the edges on the bottom piece. Using glue or adhesive, adhere the back & sides of the top piece onto the bottom piece. There will be a tab in the front of the mailbox. This is where we will attach the door.

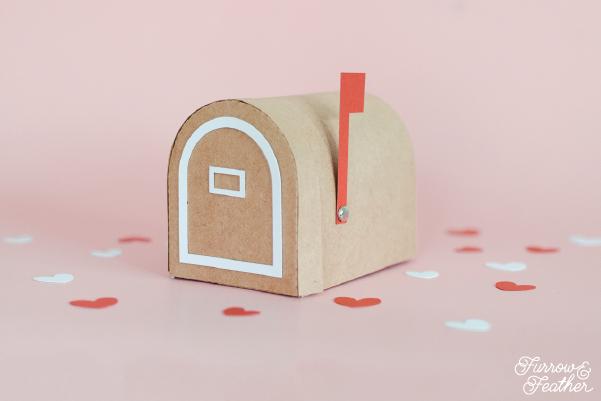
Before we attach the door, we’ll attach the flag on the side. Hold the flag so the top is flat, and the bulk is away from you. Stick the brad into the hole on the right side. Stick the brad into the hole on the mailbox, and flatten the wings. The flag is attached!

The last thing left is to attach the door. Put adhesive or glue on the tab at the front of the mailbox. Attach the door & let dry!
This project is so fun. I’ve styled it for Valentines day here, to use as a fun box for a child’s Valentines, but absolutely cut it out of your choice of cardstock, and make it your own!