
If you're looking for help with getting my files into Cricut Design Space, check out my previous tutorial.
The majority of my cards are designed to be 'box cards'. I define that as a card that is assembled to form a 'box' structure, and then the layered elements are adhered inside of the box.

If you purchased your file through my website or through Etsy, take a peek at the included instructional PDF for your purchased design. On the first page of the instructions, I identify which pieces are the front piece, middle piece(s), and back piece. For this tutorial, we're referencing the back piece with a dark pink line, the middle pieces with an orange line, and the front piece with a light pink line.
Assembling the 'box'

Many of my designs have the sides and tabs to form the box included on the back piece. In this instance, you lay the piece flat on your work surface, and fold upwards on the score lines. When looking at it from a birds eye view, it will look similar to the graphic above. Take the front piece of the card, and line it up with the tabs from the back piece. I always adhere the tabs to the back side of the front piece, so you're unable to see the tabs while looking at the card.
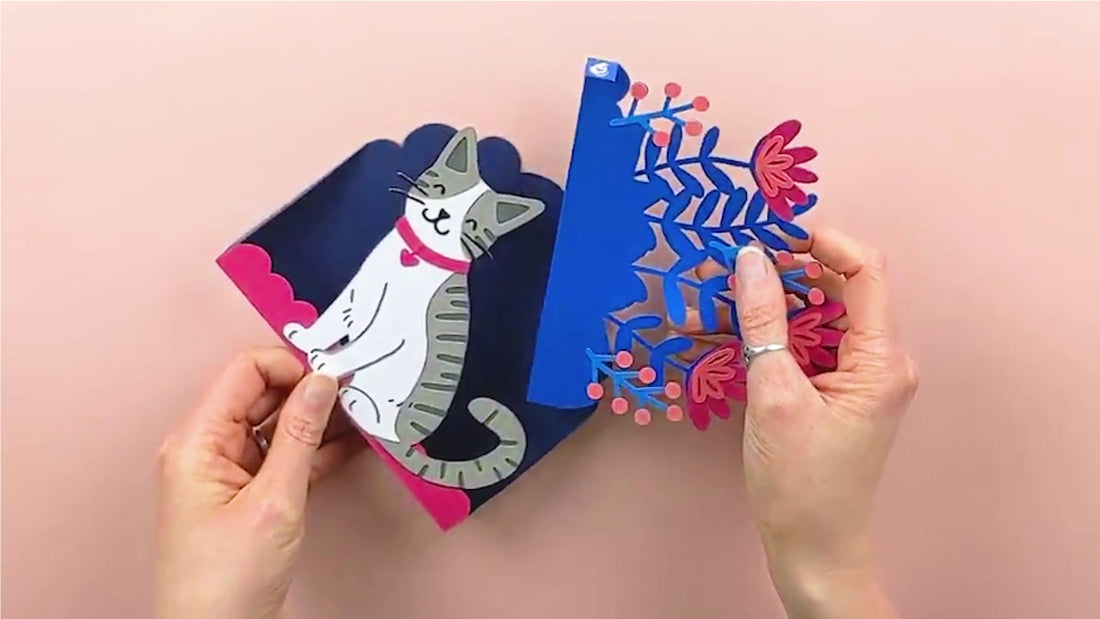
Adding the middle piece

Take the middle piece and fold on the score lines. The right tab you’ll want to fold down, the left tab you’ll want to fold up. This helps to keep the card laying flat. Add adhesive to the outside edges of the tabs, and slide the piece into the assembled box. The left tab you'll want to line up with the front left corner of the box, the right tab with the back right corner of the box. You can see a helpful birds eye view diagram above.
Make sure it is opening correctly as it dries. Sometimes it helps to put the middle piece into the card without glue at first, so you can get a feel for how the card folds.
Multiple Middle Pieces

Let's say the design you purchased has multiple middle pieces. This is very similar to the assembly steps for one middle piece, we're just adding another in the lineup. Take the middle pieces and fold on the score lines. The right tab you’ll want to fold up, the left tab you’ll want to fold down. This helps to keep the card laying flat. Add adhesive to the outside edges of the tabs, and slide both middle pieces into the assembled card. The front middle piece should go on in the front, and the back middle piece in the back. Line up both pieces while folding the card flat. Make sure it is opening correctly as it dries. Sometimes it helps to put the middle pieces into the card without glue at first, so you can get a feel for how the card folds.
Still stuck?
Sometimes it helps to watch a video to really understand the process. You can visit my Youtube channel to see a couple quick assembly videos that may help show the assembly in more detail.
Feel free to contact me if you have any specific questions!